Mastering emergency water damage cleanup steps for homeowners is a high-stakes race against time that separates a minor annoyance from a catastrophic structural failure. In 2026, the restoration industry has shifted toward rapid-response diagnostics, utilizing AI-driven moisture mapping to identify hidden pockets of saturation behind drywall and beneath flooring. When a pipe bursts or a basement floods, the clock starts ticking immediately, as mold colonization can begin within a mere twenty-four hours in humid environments. Understanding the tactical maneuvers required to mitigate losses is not merely about saving furniture; it is about preserving the indoor air quality and structural integrity of your most valuable asset. This guide dissects the professional-grade protocols used by restoration experts to stop the rot, minimize costs, and navigate the bureaucratic nightmares of modern property insurance claims.
Immediate Safety and Containment

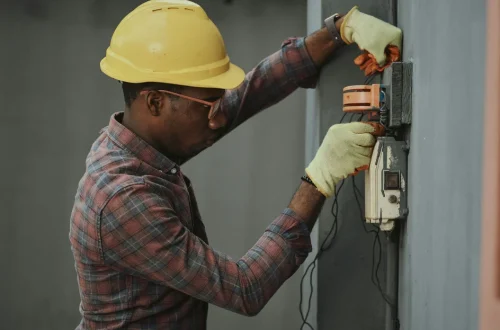
The first priority in any flooding event is electrical safety, as water acts as a lethal conduit for household currents. Before you even contemplate moving personal belongings, ensure the main power supply to the affected zone is disconnected at the circuit breaker if it can be accessed safely without wading through standing water. If the water has reached the height of electrical outlets or appliances, do not attempt to interact with the grid; contact a certified electrician or your utility provider immediately. This is the moment to establish a perimeter, preventing family members and pets from traversing contaminated zones where electrocution or slip-and-fall risks are at their peak.
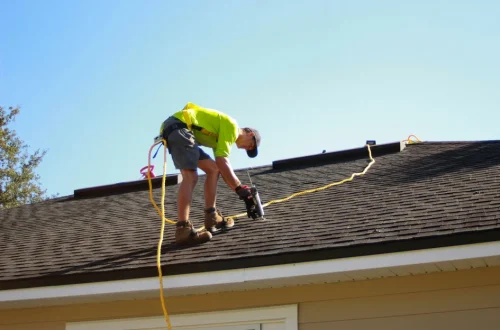
Once safety is verified, your goal is to stop the flow of water at its source. Whether this involves closing a main water shut-off valve or placing a tarp over a roof leak, physical containment is the most effective way to lower the total volume of moisture entering your home. Many homeowners overlook the necessity of documenting every stage of the disaster for their 2026 insurance policy, which often mandates detailed photographic evidence of the source before professional remediation begins. Refer to the FEMA guidance on disaster recovery to understand the specific documentation requirements that can make or break your reimbursement eligibility during the claims process.
Advanced Water Extraction Protocols
Extraction is the cornerstone of effective remediation, yet many DIY enthusiasts fail by relying on standard household shop vacuums. Professional-grade extraction in 2026 utilizes truck-mounted, high-pressure pumps that can remove hundreds of gallons of water per hour, significantly reducing the drying time of structural wood and subflooring. By removing the bulk of the liquid early, you prevent the water from wicking upward into the studs and insulation, which are far more difficult to dry once they become fully saturated. The depth of penetration is often underestimated, but industry experts know that moisture meters must be used to track the drying progress in real-time.
If you choose to manage the initial cleanup, focus on removing porous items like rugs and upholstery that act as sponges. These materials are notorious for hosting bacterial growth, especially if the water source is categorized as gray water or black water. You should prioritize the removal of items that are resting directly on the floor, as these will absorb moisture via capillary action. By lifting items onto solid surfaces or removing them from the premises entirely, you reduce the humidity load in the room, making it easier for industrial-grade dehumidifiers to do their work effectively later in the process.
Dehumidification and Air Circulation
The Science of Structural Drying
Effective structural drying is not simply about blowing air; it is about managing the vapor pressure differential between the air and the materials. In 2026, the gold standard involves using LGR (Low Grain Refrigerant) dehumidifiers that can extract moisture even in environments with very low humidity levels. Fans must be positioned strategically to promote evaporation, which turns liquid water into vapor that the dehumidifiers then capture. Without this balanced approach, you risk creating a “sweating” effect where moisture is driven deeper into the wall cavities, leading to secondary damage like warping, buckling, and hidden mold blooms that may not appear for weeks.
A common mistake is assuming that open windows will suffice, but in many climates, this actually introduces more moisture into the home. Instead, keep the environment sealed and rely on climate-controlled mechanical dehumidification to pull moisture out of the air continuously. Professional restoration teams will monitor the psychrometric readings—tracking the temperature and relative humidity—to ensure the drying environment remains optimized. If you are handling this yourself, invest in an accurate hygrometer to track these levels, aiming to keep your indoor relative humidity below 50 percent to effectively inhibit the growth of mold spores and other microbial contaminants.
Cost & Pricing Breakdown
Understanding the financial commitment of water damage cleanup is essential for budgeting. Costs vary depending on the category of water (clean, gray, or black) and the square footage affected. The following table outlines the 2026 industry standard pricing tiers for residential remediation services.
| Service Tier | Scope of Work | Estimated Cost Range |
|---|---|---|
| Minor (Category 1) | Localized cleanup, drying, no demolition | $1,500 – $3,500 |
| Moderate (Category 2) | Multiple rooms, some drywall removal | $4,000 – $8,500 |
| Severe (Category 3) | Sewage backup, structural repair, mold | $10,000 – $25,000+ |
Budgeting tips include keeping an emergency fund specifically for home repairs, as insurance deductibles can often be high. Always verify that your restoration contractor is IICRC-certified, as using unlicensed labor can lead to poor drying results that insurance companies may refuse to cover during the final reconciliation phase. Check the IICRC certification portal to ensure the technicians handling your home meet the current 2026 standards for professional restoration and safety protocols.
Pros and Cons Analysis
Deciding between a professional restoration service and a DIY approach is a critical juncture for any homeowner. Each path presents distinct advantages and significant drawbacks that must be weighed against the severity of the damage.
Professional Restoration Pros: Experts utilize advanced moisture detection sensors and industrial-grade air movers that are not available to the general public. They provide comprehensive documentation for insurance companies, often leading to faster and more successful claim payouts. Furthermore, their experience in identifying hidden moisture prevents long-term mold issues that could compromise the health of your household.
Professional Restoration Cons: The primary downside is the cost, which can be prohibitive for those without comprehensive insurance coverage. Scheduling can also be a challenge during widespread weather events when demand outstrips supply, potentially leaving your home untreated for several critical days.
DIY Cleanup Pros: The primary benefit is speed; you are on-site immediately to stop the leak and start extraction. This immediate action can prevent thousands of dollars in secondary damage. It is also significantly more cost-effective for minor, clean-water incidents like a small sink overflow or a leaky pipe.
DIY Cleanup Cons: The lack of specialized training often leads to incomplete drying. Many homeowners fail to address moisture trapped behind baseboards or inside wall cavities, which often leads to hidden, structural mold growth. Additionally, improper handling of contaminated water can pose severe health risks, and insurance adjusters may dispute claims if they believe the amateur cleanup efforts exacerbated the damage.
Navigating Insurance and Documentation
Insurance companies in 2026 are increasingly strict regarding the evidence required to validate a claim. You must act as your own investigator, creating a comprehensive log that includes the date and time of the incident, the suspected cause, and a detailed inventory of damaged items. Take high-resolution video footage of the area before moving anything, ensuring you capture the water line on the walls and the condition of the flooring. This visual record acts as the primary evidence when the adjuster conducts their inspection, often weeks after the initial crisis has passed.
Communication with your insurance provider should be written and frequent. Do not dispose of any damaged materials, such as carpet remnants or saturated drywall, until an adjuster has specifically authorized the disposal or performed an inspection. If you must remove materials to prevent health hazards or further structural decay, keep samples of the materials and take clear photographs of the items in their original locations. Following these steps ensures that you remain in compliance with the policy terms, protecting your right to a fair settlement in the wake of the 2026 property disaster landscape.
Key Takeaways
- Prioritize safety by disconnecting power and identifying the water source immediately.
- Use professional-grade equipment like LGR dehumidifiers for effective structural drying.
- Document every stage of the damage and cleanup for insurance verification.
- Understand that mold growth begins within 24 hours, necessitating rapid response.
- Verify the IICRC certification of any restoration contractor you hire for the job.
- Avoid disposing of damaged property until you have received clear approval from your insurance adjuster.
Frequently Asked Questions
Can I use a household fan to dry out my walls?
Standard fans are insufficient for structural drying; they move air without removing moisture, which can actually spread mold spores throughout the house. You need industrial air movers paired with dehumidifiers to achieve effective results.
When should I call a professional instead of doing it myself?
If the water source is contaminated, such as a sewer backup, or if the water has affected more than a single room, you must hire professionals to ensure safety and prevent long-term structural decay.
How long does the drying process usually take?
In most residential cases, a professional drying setup will run for three to five days, depending on the materials affected and the level of saturation measured by moisture sensors.
Will my homeowners insurance cover the cost of the cleanup?
Coverage depends on your specific policy and the cause of the damage; typically, sudden and accidental leaks are covered, while damage resulting from lack of maintenance or flooding from natural disasters may require separate riders.
How do I know if the area is truly dry?
You cannot rely on touch; professionals use moisture meters to test the moisture content of wood, drywall, and subflooring, comparing the results against a dry baseline to confirm the area is safe for reconstruction.
Conclusion
Emergency water damage cleanup is a test of resilience that requires a blend of immediate action, precise documentation, and expert-level equipment. By following the protocols outlined in this guide, you can protect your home from the silent threat of secondary damage and ensure your insurance claim is handled with the authority it deserves. While the process is undoubtedly stressful, acting with purpose and relying on professional standards will significantly improve your recovery outcomes. Stay vigilant, document your progress, and prioritize the structural health of your home to navigate these challenges successfully throughout the year 2026.
- DIY Home Maintenance Checklist for Every Season
- Shingle Damage Control: Immediate Roof Protection Methods
- Burning Smell From Electrical Outlet? How To Identify It Safely
- Property Damage Recovery After Water Exposure: An Essential Planning Guide
- How to Fix a Leaking Pipe Under the Sink Without Professional Help