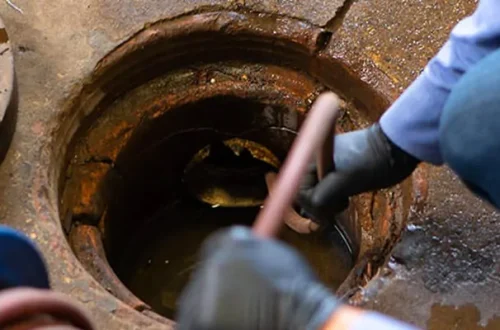
Dealing with a leaking water heater drain valve can be a sudden and unwelcome surprise, often causing a bit of panic when you spot that tell-tale puddle. It’s a common household issue that, while frustrating, doesn’t always demand an immediate, expensive emergency plumbing call. The good news is that there are several effective ways to temporarily seal a leaking water heater drain valve, giving you precious time to plan a permanent repair or replacement. Remember, these are stop-gap measures designed to prevent further water damage and buy you a day or two, not long-term solutions. Your safety is paramount, so always approach plumbing repairs with caution and common sense. Let’s dive into how you can tackle this watery challenge with confidence.
Why Your Drain Valve Might Be Leaking
A leak from your water heater’s drain valve often signals underlying issues that need attention. One of the most common culprits is sediment buildup. Over time, minerals from your home’s water supply can accumulate at the bottom of the tank, eventually reaching and interfering with the drain valve’s seal. This gritty sediment prevents the valve from closing completely, leading to a persistent drip or a steady stream. Another frequent cause is simply wear and tear; the rubber or plastic seals within the valve can degrade, crack, or become brittle over years of use, especially if the valve is rarely operated.
Sometimes, the leak isn’t due to internal damage but rather a loose connection. The valve itself might not be tightly screwed into the tank, or the cap on the end of the valve might be loose. The material of the valve also plays a role; older plastic drain valves are more prone to cracking and warping compared to more durable brass alternatives. Thermal expansion and contraction from constant heating and cooling cycles can stress these materials, leading to hairline fractures that eventually manifest as leaks. Identifying the likely cause can sometimes inform your temporary sealing strategy.
Safety First: Before You Begin
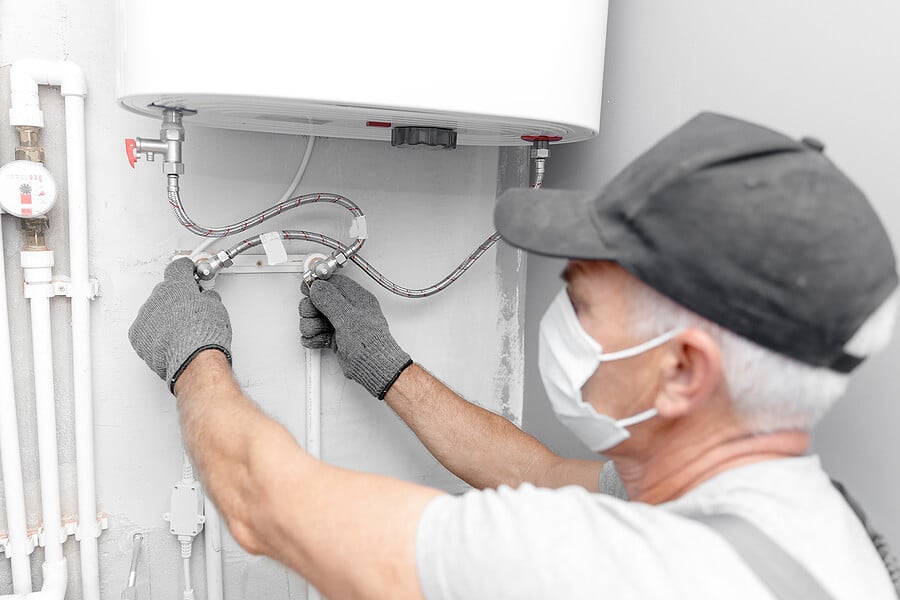
Before you even think about touching that leaking drain valve, safety must be your absolute priority. Working with water heaters involves both hot water and electricity or gas, posing significant risks if not handled correctly. The very first step is to turn off the power supply to your water heater. For electric models, locate the circuit breaker for the water heater in your home’s electrical panel and flip it to the “off” position. For gas models, turn the gas control knob on the water heater to the “pilot” or “off” setting. This prevents the unit from heating water while you’re working and eliminates electrical or gas hazards.
Next, you must shut off the cold water supply to the water heater. Look for a valve on the cold water inlet pipe, usually located at the top of the water heater, and turn it clockwise until it’s completely closed. This stops new water from entering the tank, reducing pressure and preventing continuous refilling of water that could potentially leak out. Always wear appropriate personal protective equipment, such as heavy-duty gloves and eye protection, to guard against hot water, sharp edges, or chemical exposure. Have plenty of towels and a bucket ready to catch any escaping water, ensuring your workspace remains as dry and safe as possible.
Essential Tools and Materials
To effectively temporarily seal a leaking water heater drain valve, you don’t always need specialized plumbing tools. Many household items can come to your rescue in a pinch, providing a quick fix that buys you crucial time. For minor drips, a roll of plumber’s tape, also known as PTFE tape or Teflon tape, is incredibly useful. It’s designed to create a watertight seal on threaded connections. For slightly more substantial leaks, a two-part epoxy putty can be a lifesaver. This moldable compound hardens quickly to form a strong, waterproof seal around the leak point, conforming to irregular shapes.
Another excellent option involves using a hose clamp combined with a piece of rubber. You can repurpose a piece of old bicycle inner tube, a thick rubber glove, or even a section of a sturdy rubber mat. The rubber acts as a patch, and the hose clamp provides the necessary compression to hold it tightly against the leaking area, effectively stopping the flow. Additionally, having a bucket, towels, a wrench, and a wire brush on hand will be beneficial. The wrench might be needed to gently tighten the valve, while a wire brush can help clean the area around the leak, ensuring better adhesion for any sealing compounds you might apply. These materials are widely available at hardware stores, making emergency repairs accessible in 2026.
Step-by-Step: Applying a Temporary Seal
Once you’ve ensured all safety precautions are in place, you can begin the process of applying a temporary seal. Start by thoroughly cleaning the area around the drain valve. Use a wire brush or an old rag to remove any dirt, rust, or sediment that might interfere with adhesion. For very minor leaks, sometimes simply tightening the drain valve or its cap slightly with a wrench can stop the drip. However, be cautious not to overtighten, especially if it’s a plastic valve, as this can cause cracking and worsen the problem. If the leak is from the threaded connection where the valve meets the tank, you might try applying plumber’s tape. With the water supply off and pressure relieved, carefully unscrew the drain valve cap or the entire valve (if confident), wrap several layers of plumber’s tape clockwise around the threads, and then re-tighten.
For more persistent drips or small streams, an epoxy putty or a rubber patch and hose clamp combination are excellent temporary solutions. If using epoxy putty, knead the two parts together according to the manufacturer’s instructions until it forms a uniform color. This usually activates the hardening process. While it’s still pliable, firmly press the putty over the leaking area, ensuring it covers the crack or drip point completely and extends slightly beyond it for a good seal. Smooth it out and hold it in place for a few minutes to allow it to begin setting. For the hose clamp method, cut a piece of rubber slightly larger than the leaking area. Position the rubber patch over the leak, then wrap a hose clamp around the valve and over the patch. Tighten the hose clamp firmly with a screwdriver, ensuring the rubber is compressed against the leak to stop the water flow. Remember, these fixes are meant to hold until a professional can perform a proper repair or replacement.
Using Epoxy Putty for a Quick Fix
Epoxy putty is a fantastic tool for a rapid, temporary seal on a leaking water heater drain valve, especially when dealing with irregular cracks or pinholes. The key to its success lies in proper preparation and application. First, ensure the area around the leak is as dry and clean as possible; any moisture or grime will compromise the putty’s adhesion. Follow the manufacturer’s instructions for mixing the two components of the epoxy putty. Typically, you’ll break off a section and knead it vigorously with your fingers until it reaches a uniform color and warm consistency. This mixing process activates the hardening agent. Once mixed, immediately and firmly press the pliable putty directly onto the leak, making sure it completely encapsulates the source of the drip. Mold it smoothly over the area, extending slightly beyond the edges of the crack or hole. Hold it in place for several minutes, applying constant pressure, to allow it to bond securely. The putty will begin to harden quickly, often within 5-10 minutes, forming a robust, waterproof barrier that can temporarily stop the leak for several hours or even days while you arrange for a professional plumber.
Monitoring Your Temporary Repair
After you’ve applied a temporary seal to your water heater drain valve, your work isn’t entirely done. It’s crucial to monitor the repair closely to ensure it holds and doesn’t worsen the situation. Once you’ve completed the temporary fix, slowly turn the cold water supply back on to the water heater. Then, if it’s an electric heater, restore power at the circuit breaker; for a gas heater, turn the gas control knob back to the “on” position. Keep a close eye on the drain valve for the next several hours and even into the following day. Look for any signs of continued dripping, seepage, or a complete failure of the temporary seal. Place a dry towel or a piece of paper directly underneath the valve to easily spot any new moisture.
If the temporary seal holds, congratulations! You’ve successfully bought yourself some time. However, this is not an excuse to delay seeking a permanent solution. Contact a qualified plumber as soon as possible to schedule a proper repair or replacement of the drain valve. If the temporary fix doesn’t hold, or if the leak reappears or worsens, do not attempt further temporary patches. In such cases, it’s best to immediately shut off the water supply and power/gas to the water heater again and call a plumber for emergency service. Proactive scheduling for a permanent fix in early 2026 will save you future headaches and potential water damage.
When to Call a Professional Plumber
While a temporary seal can be a great immediate solution, it’s vital to recognize when the problem is beyond a quick DIY fix and requires professional expertise. If your water heater is old, showing signs of significant rust or corrosion, or if the leak is coming from anywhere other than the drain valve itself (such as the top or bottom of the tank), it’s almost certainly time to call a professional plumber. Major leaks, especially those that can’t be contained by a temporary patch, also warrant immediate professional attention. Gas water heaters, in particular, demand extra caution; any issues with gas lines or components should always be handled by certified professionals due to the inherent safety risks.
A professional plumber can accurately diagnose the root cause of the leak, which might be more complex than a simple worn seal. They have the right tools and expertise to safely replace the drain valve, flush out sediment, or even recommend a full water heater replacement if the unit is nearing the end of its lifespan. Attempting a complex repair yourself, especially if you lack experience, could void your warranty, lead to more extensive damage, or create hazardous conditions. Investing in a professional repair ensures the job is done correctly, safely, and provides a lasting solution to protect your home from future water damage.
Key Takeaways
- Always prioritize safety: turn off power/gas and water supply before starting.
- Temporary seals buy time but are not permanent solutions.
- Common temporary fixes include plumber’s tape, epoxy putty, or a rubber patch with a hose clamp.
- Thoroughly clean the leak area for better adhesion of sealing materials.
- Monitor your temporary repair closely for any signs of failure or worsening leaks.
- Call a professional plumber promptly for a permanent repair or replacement, especially for complex issues or gas heaters.
Frequently Asked Questions
Is a leaking water heater drain valve dangerous?
Yes, a leaking water heater drain valve can be dangerous. While a small drip might seem minor, it can lead to significant water damage, promote mold growth, and create slip hazards. If the leak is substantial, it could potentially cause electrical shorts if water reaches electrical components. For gas heaters, any compromised integrity of the tank or components could be extremely hazardous. Addressing the leak promptly, even with a temporary fix, is crucial for safety.
How long will a temporary seal last?
The duration of a temporary seal can vary widely depending on the severity of the leak, the materials used, and the pressure within the tank. It could last anywhere from a few hours to a few days. It is not designed to be a long-term solution and should only be relied upon to buy you enough time to schedule a professional plumber for a permanent repair or replacement.
Can I replace the water heater drain valve myself?
Replacing a water heater drain valve can be a DIY project for those with some plumbing experience, but it requires completely draining the tank and working with threaded connections, which can be challenging due to sediment buildup. It’s often best left to a professional plumber, especially if you have a gas water heater or if the valve is seized or difficult to access, to ensure it’s done correctly and safely.
What causes sediment buildup in a water heater?
Sediment buildup is caused by minerals, primarily calcium and magnesium, naturally present in your home’s water supply. These minerals settle to the bottom of the water heater tank as water is heated. Over time, this sediment accumulates, forming a thick layer that can clog the drain valve, reduce heating efficiency, and even damage the tank lining.
Should I drain my water heater if it’s leaking?
If your water heater drain valve is leaking, you should only attempt to drain the water heater as part of a controlled repair process, after shutting off the power/gas and cold water supply. Do not attempt to fully drain a leaking tank if the leak is uncontrolled or if you are unsure of how to proceed, as this could lead to more significant water damage. A professional plumber will know the safest way to handle draining for repair or replacement.
Conclusion
Discovering a leaking water heater drain valve can be an unnerving experience, but armed with the right knowledge, you can tackle it effectively. Remember, the goal of a temporary seal is to prevent further damage and provide a much-needed reprieve until a professional can perform a lasting repair. Always prioritize safety by shutting off power/gas and the water supply before attempting any fixes. While methods like plumber’s tape, epoxy putty, or a rubber patch with a hose clamp can offer quick relief, they are not permanent solutions. It’s crucial to contact a qualified plumber promptly after your temporary fix to ensure the issue is resolved permanently and safely, giving you peace of mind for years to come.
- Safe Ladder Positioning Techniques for Roof Access: A Step-by-Step Guide
- Common Household Repairs That Save Money on Contractors
- How to Repair Loose Roof Flashing Safely: A Step-by-Step DIY Guide
- Property Damage Recovery After Water Exposure: An Essential Planning Guide
- Electrical Safety Inspection Checklist for Older Homes