Learning how to prevent hidden mold after water intrusion is the most critical step for homeowners and property managers facing sudden leaks or flooding in 2026. Water damage often extends far beyond the visible puddles on the floor, seeping into wall cavities, under floorboards, and behind baseboards where it remains trapped. Without immediate intervention, these damp environments become breeding grounds for toxic fungal spores that can compromise structural integrity and indoor air quality. This guide provides a comprehensive strategy for identifying moisture pockets and implementing effective drying protocols to ensure your property remains safe and mold-free. By understanding the science of evaporation and the behavior of moisture in modern building materials, you can mitigate risks before they escalate into expensive remediation projects.
The 48-Hour Critical Response Window
The immediate aftermath of a water event requires a rapid and systematic approach to moisture extraction. In the professional restoration industry, the first 24 to 48 hours are considered the golden window for preventing the onset of fungal colonies. During this period, the primary goal is to lower the relative humidity of the affected space to below 60 percent, as higher levels facilitate rapid spore germination. Homeowners must prioritize the removal of standing water using submersible pumps or wet-dry vacuums while simultaneously assessing the extent of migration. Understanding how to prevent hidden mold after water intrusion starts with acknowledging that water travels the path of least resistance, often settling in hard-to-reach areas.
Beyond simple extraction, the physical removal of saturated porous materials is often necessary to prevent secondary damage. Items such as thick carpeting, padded underlays, and cellulose-based insulation act like sponges, holding moisture long after the surface appears dry. If these materials remain in place, they create a microclimate that is shielded from standard airflow, allowing mold to thrive undetected behind the scenes. In 2026, restoration standards emphasize the dry or discard rule, which suggests that if a porous item cannot be completely dried within two days, it should be removed to protect the rest of the structure. This proactive disposal is a fundamental component of a successful mold prevention strategy for any modern building.
Utilizing Advanced Moisture Detection Technology
Detecting moisture that the naked eye cannot see is essential for a thorough remediation process. Modern restoration professionals rely on infrared thermography to identify temperature variations that indicate moisture behind drywall or under hardwood floors. These thermal imaging cameras allow for a non-invasive assessment of the building envelope, highlighting cold spots where evaporation is currently occurring. By mapping these thermal anomalies, you can pinpoint exactly where to focus your drying efforts without having to tear down every wall. This targeted approach not only saves time but also significantly reduces the overall cost of repairs while ensuring no hidden dampness is left behind to foster future fungal growth.
Moisture meters serve as the secondary line of defense in a comprehensive detection strategy. These devices provide quantitative data on the moisture content of various materials, ranging from wood to masonry. Pin-type meters measure electrical resistance between two probes, while pinless meters use electromagnetic signals to scan larger areas for sub-surface moisture. Consistent monitoring of these levels is required until the materials reach their dry standard, which is the typical moisture level for that specific material in a healthy environment. Integrating these tools into your post-flood routine is the only way to verify that your drying efforts have been successful and that the risk of hidden mold has been eliminated.
Calibrating Moisture Meters for Accuracy
Proper calibration of detection equipment is a technical necessity that many DIY enthusiasts overlook during the stress of a water intrusion event. To ensure the readings are accurate, devices must be calibrated according to the manufacturer’s specifications and adjusted for the specific species of wood or type of building material being tested. Environmental factors, such as ambient temperature and humidity, can also influence the conductivity of materials, leading to false positives or misleadingly low readings. Professionals often use a calibration block to verify the device’s accuracy before each use, ensuring that every data point collected is a reliable indicator of the structure’s current state of dryness and safety.
Strategic Ventilation and Airflow Management
Effective drying is not just about heat; it is about the movement of air and the removal of moisture from the environment. High-velocity air movers are designed to create a vortex of airflow that pulls moisture out of porous materials and into the air. However, simply moving air is insufficient if the ambient humidity is high; the moisture must be actively removed from the room. This is why Low Grain Refrigerant (LGR) dehumidifiers are essential in modern restoration. These machines are capable of removing significantly more water from the air than standard household units, even in cooler temperatures, which prevents the secondary condensation that often leads to mold on ceilings and upper wall sections.
Strategic placement of equipment is just as important as the equipment itself. Air movers should be positioned to create a continuous circuit of airflow across the wettest surfaces, while dehumidifiers should be placed in the center of the room to maximize their intake. In cases of significant water intrusion, it may be necessary to use “tenting” techniques, where plastic sheeting is used to isolate a specific area, concentrating the drying power of the equipment on a single wall or floor section. This focused approach accelerates the evaporation process, ensuring that building materials reach their dry standard before mold spores have the opportunity to take root and colonize the interior structure.
Evaluating Material Porosity and Structural Risks
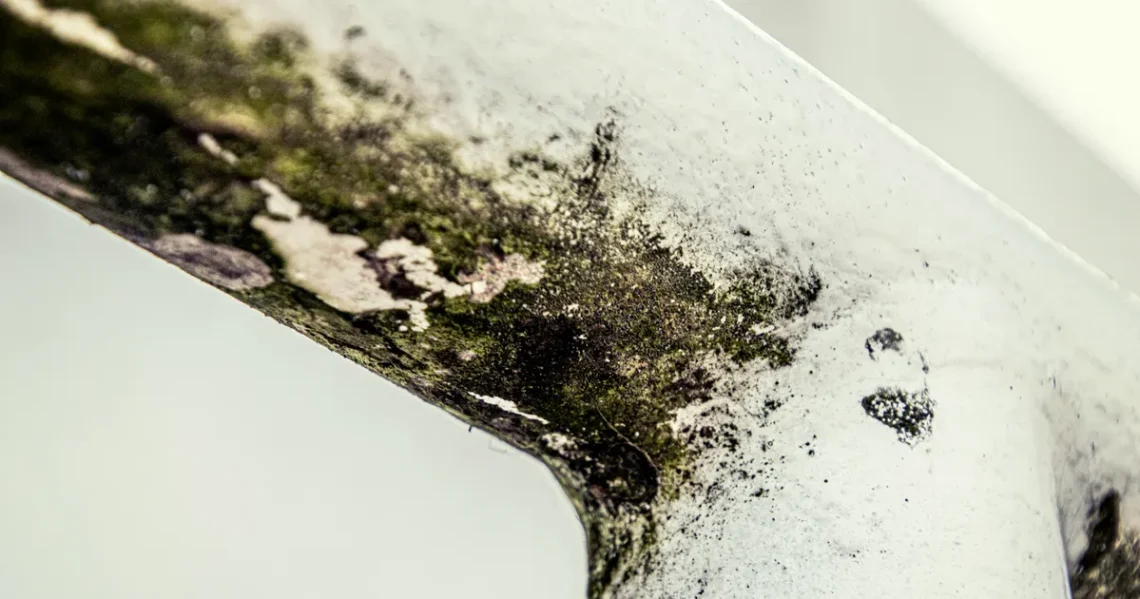
Different building materials react uniquely to water exposure, and understanding these differences is key to preventing hidden mold. For instance, drywall is highly porous and contains paper, which is a primary food source for mold species like Stachybotrys. If water has wicked up a wall, the bottom portion of the drywall usually needs to be removed to allow the wall cavity and the wooden studs behind it to dry properly. Conversely, non-porous materials like tile or metal may only require surface cleaning and drying. Following the EPA guidelines on mold remediation helps in determining which materials are salvageable and which pose a long-term risk to the indoor environment.
| Material Type | Porosity Level | Recommended Action | Est. Drying Time |
|---|---|---|---|
| Drywall | High | Remove if saturated | 48-72 Hours |
| Hardwood | Medium | Specialized floor drying | 7-14 Days |
| Concrete | Low | Dehumidification | 3-5 Days |
| Carpet Pad | High | Always remove and discard | N/A |
The table above illustrates the varying timelines and actions required for common household materials. Hardwood floors, for example, require a much more patient approach because the wood grains can trap moisture for weeks. Using specialized floor-drying mats that use suction to pull moisture through the wood is often the only way to save high-end flooring. Failure to address the subfloor moisture will inevitably lead to cupping, crowning, and the growth of mold beneath the planks. By categorizing materials based on their porosity, you can develop a targeted drying plan that addresses the hidden risks inherent in each specific component of your home’s construction.
Professional Remediation vs. DIY Solutions
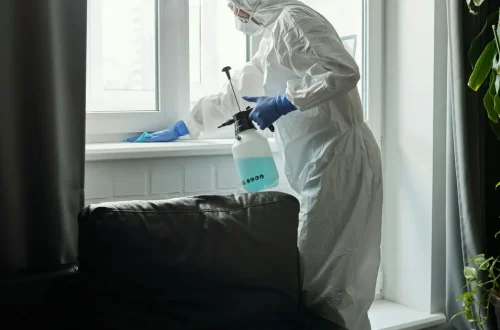
While many minor leaks can be handled by a proactive homeowner, significant water intrusion often requires professional expertise to ensure the property is fully protected. Certified restoration technicians follow the IICRC S500 standards, which provide a rigorous framework for professional water damage restoration. These professionals have access to industrial-grade equipment and advanced biocides that are not available to the general public. They also carry the liability insurance and certifications necessary to guarantee that the work meets safety codes. For large-scale flooding or sewage backups, attempting a DIY fix can lead to incomplete drying and severe health risks from contaminated water sources.
Choosing a professional service also provides the benefit of documented moisture readings and thermal imaging reports, which are invaluable for insurance claims. Most insurance adjusters require proof that the property was dried to industry standards before they will approve payments for repairs. A professional company will provide a comprehensive “drying log” that tracks the progress of the restoration from start to finish. This documentation serves as a certificate of health for your home, proving to future buyers or insurers that the water intrusion was handled correctly and that there is no risk of hidden mold lingering in the structural components of the building.
Establishing a 2026 Preventative Maintenance Plan
In 2026, the best way to prevent hidden mold is to stop water intrusion before it starts through the use of smart home technology. Modern leak detection systems can now be integrated directly into a home’s plumbing, automatically shutting off the main water valve the moment an unusual flow is detected. These sensors can be placed under sinks, near water heaters, and behind washing machines to provide real-time alerts to your smartphone. By stopping the flow of water instantly, you drastically reduce the volume of moisture that can enter wall cavities, making the subsequent drying process much simpler and more effective for the average property owner.
Regular inspections of the building’s exterior envelope are equally important for long-term mold prevention. This includes checking the integrity of roof shingles, ensuring gutters are clear of debris, and verifying that the ground slopes away from the foundation. Over time, small cracks in the foundation or gaps in window caulking can allow “micro-leaks” to occur, which are often the most common cause of hidden mold because they go unnoticed for months. By combining modern sensor technology with traditional maintenance practices, you create a multi-layered defense system that protects your property from the devastating effects of water damage and subsequent fungal growth.
Key Takeaways
- Act within the first 24 to 48 hours to prevent mold spores from colonizing damp materials.
- Use infrared cameras and moisture meters to find water trapped behind walls and under floors.
- Prioritize the removal of saturated porous materials like carpet padding and wet insulation.
- Utilize LGR dehumidifiers and high-velocity air movers to maintain relative humidity below 60 percent.
- Document all drying efforts and moisture levels to support insurance claims and verify structural safety.
- Invest in smart leak detection systems to provide automatic protection against future water intrusion events.
Frequently Asked Questions
How long does it take for mold to grow after a leak?
Mold can begin to germinate and grow in as little as 24 to 48 hours after a water intrusion event occurs. The speed of growth depends on the temperature, the type of material affected, and the level of humidity in the environment. This is why immediate drying is the most effective way to prevent a minor leak from turning into a major mold infestation.
Can I just use a fan to dry out a wet wall?
A standard household fan is usually insufficient for drying out the internal structure of a wall because it cannot move enough air to penetrate the drywall. Professional air movers and dehumidifiers are required to pull moisture out of the wall cavity. Simply drying the surface of the wall can leave the interior damp, which often leads to hidden mold growth over time.
Does bleach kill mold on porous surfaces?
Bleach is generally not recommended for killing mold on porous surfaces like wood or drywall. While it may kill the mold on the surface, the water content in bleach can actually soak into the material and provide moisture for the mold roots to grow deeper. It is better to use a dedicated antimicrobial solution or to remove and replace the affected porous materials entirely.
How do I know if there is mold behind my walls?
Signs of hidden mold include a persistent musty odor, unexplained respiratory issues, or visible staining and bubbling on the drywall. If you suspect hidden mold, using a moisture meter or a thermal imaging camera can help identify damp spots that may be harboring fungal growth. In some cases, a professional may need to take air samples or create a small inspection hole to confirm the presence of mold.
Will my insurance cover mold remediation?
Insurance coverage for mold remediation depends on the cause of the initial water damage and the specifics of your policy. Most policies cover mold if it is the direct result of a “sudden and accidental” water event, such as a burst pipe. However, mold caused by long-term neglect or poor maintenance is often excluded, which highlights the importance of immediate action and proper documentation after any leak.
Conclusion
Successfully preventing hidden mold after a water intrusion event in 2026 requires a blend of immediate action, advanced technology, and a deep understanding of building science. By focusing on rapid moisture extraction and utilizing precise detection tools, you can ensure that your property is thoroughly dried from the inside out. Remember that the goal is not just to dry what you can see, but to eliminate the moisture hidden within the structure. Taking these proactive steps today will protect your property’s value and, more importantly, the health of everyone who lives or works inside the building.
- Roof Inspection Guide to Identify Hidden Damage Early
- Essential Electrical Safety Checklist Before Fixing Home Appliances
- Quick Fix Guide: Temporarily Seal a Leaking Water Heater Drain Valve
- Signs of Structural Damage Every Homeowner Should Know
- How to Safely Inspect Your Emergency Breaker Panel: A Guide