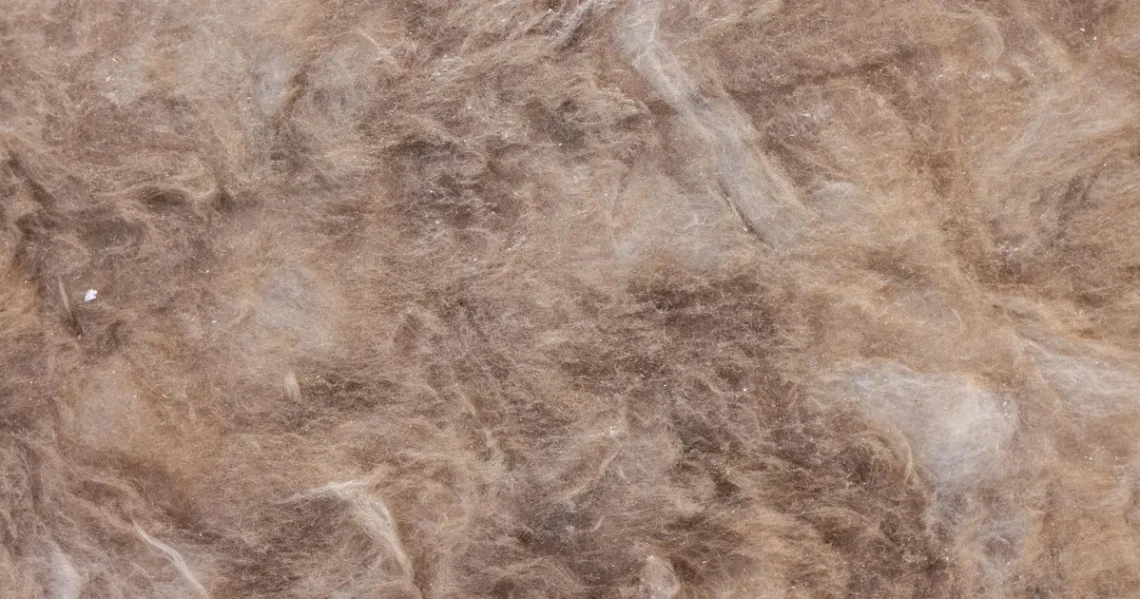
If you are currently wondering how to dry out wet fiberglass insulation inside a wall cavity, you have likely encountered a stressful household leak or a sudden weather event. Dealing with moisture trapped behind your drywall is a common concern for homeowners in 2026, especially as we see more extreme shifts in seasonal precipitation. Fiberglass insulation acts much like a giant sponge, trapping water within its fine glass fibers and holding it against the wooden studs of your home. If left unaddressed, this trapped moisture can lead to structural rot, loss of thermal efficiency, and the growth of unhealthy microorganisms. In this guide, I will walk you through the most effective methods to salvage your walls while keeping your home safe and comfortable. We will explore the tools you need and the timeline required to ensure your interior environment remains dry and durable for years to come.
Assessing the Severity of Water Intrusion
Before you can begin the drying process, you must determine exactly how much water has entered the wall cavity. Not all moisture events are created equal, and the source of the water dictates your next steps. For instance, clean water from a burst pipe is much easier to manage than “black water” from a sewer backup or outdoor flooding. If the insulation has been submerged in contaminated water, the Environmental Protection Agency generally recommends total replacement rather than drying. However, for clean water leaks, you can often save the material if you act within the first twenty-four to forty-eight hours. Start by using a high-quality moisture meter to test the drywall surface and the baseboards to map out the affected area.
Once you have identified the boundaries of the wet zone, you should inspect the insulation for sagging or compression. Fiberglass relies on tiny air pockets to provide resistance to heat flow, and once these pockets fill with water, the material often collapses under its own weight. If the batts look significantly slumped or have turned a dark, muddy color, they may have lost their structural integrity permanently. In such cases, trying to dry them out might be a lost cause because they will no longer provide the R-value your home requires. For minor dampness, however, a focused drying strategy can effectively pull the moisture out before permanent damage occurs. Taking the time to do a thorough assessment now will save you from expensive repairs later in the 2026 season.
The Essential Role of Increased Airflow
Airflow is your best friend when learning how to dry out wet fiberglass insulation inside a wall cavity. The goal is to move as much dry air as possible through the space to encourage evaporation. Since wall cavities are naturally enclosed, you must create a way for the moisture to escape. This often involves removing the baseboards and drilling small holes, known as weep holes, into the drywall near the floor. By doing this, you allow air to circulate behind the wall surface where the insulation is trapped. Without these openings, the moisture remains stagnant, and the drying process can take weeks instead of days. Using high-velocity floor fans directed at these openings will significantly accelerate the evaporation rate by constantly replacing humid air with drier air.
In addition to using fans, you should consider the humidity levels of the entire room. If the air in the room is already saturated with moisture, it cannot absorb any more from the walls. This is why keeping windows closed and running a heavy-duty dehumidifier is often more effective than simply opening a window. You want to create a “drying chamber” where the air is thirsty for moisture. Position your fans so they create a vortex or a steady stream of air that hits the wall at an angle, rather than straight on. This method helps the air penetrate the small holes you have made and reach the fiberglass fibers. Consistency is key here; you should keep the fans running twenty-four hours a day until the moisture meter readings return to a normal baseline.
Using Professional Drying Equipment
While standard household fans can help with minor dampness, professional-grade equipment is often necessary for deep-seated moisture. High-capacity dehumidifiers are designed to pull gallons of water out of the air daily, which is essential when you have a large area of wet fiberglass. These machines are much more powerful than the small units used for basements and can maintain a very low relative humidity. You can typically rent these from local hardware stores or restoration companies. Using professional gear ensures that you are not just drying the surface of the drywall but actually pulling moisture from the dense center of the insulation batts. This level of power is crucial for preventing long-term issues like wood rot in the wall studs.
Checking for Hidden Moisture Pockets
Even when the exterior of the wall feels dry to the touch, moisture can hide deep within the fiberglass or against the backside of the exterior sheathing. To ensure a thorough job, you should use a “search and see” approach by checking the moisture levels at different heights. Wetness tends to settle at the bottom of the wall, but capillary action can sometimes pull it several inches upward. Use a thermal imaging camera if available, as these devices can show cold spots that indicate lingering moisture that the naked eye cannot see. By being meticulous with your measurements, you can avoid the mistake of sealing up a wall that is still damp in the middle. This step is the difference between a successful DIY fix and a future mold problem.
Another advanced tool to consider is an axial fan, which is designed to move air over long distances with high pressure. These are particularly useful if the wall cavity is deep or if you are trying to dry a long stretch of hallway. When combined with an LGR (Low Grain Refrigerant) dehumidifier, these fans can dry out materials that would otherwise be impossible to save. According to the Department of Energy, maintaining the integrity of your insulation is vital for home efficiency. Using the right tools in 2026 allows you to restore your home to its original state without the massive waste of a full tear-out. Remember to monitor the equipment regularly to ensure it is draining properly and continuing to lower the ambient humidity.
A Step-By-Step Guide to Drying Walls
The process of drying out your walls requires a systematic approach to ensure no step is missed. Following a logical sequence will help you manage the workload and track your progress effectively. First, you must stop the source of the water immediately, whether it is a leaking pipe or a gap in the exterior siding. Once the leak is stopped, clear the area of furniture and rugs to prevent secondary damage and to give yourself plenty of space to work. It is also wise to turn off the electricity to the affected wall at the breaker box if you suspect water has reached any outlets or internal wiring. Safety should always be your first priority when dealing with water and electricity in tandem.
Next, follow this specific order of operations to maximize your drying efficiency:
- Remove all baseboards and trim to expose the bottom edge of the drywall.
- Drill one-inch holes every six inches between the wall studs to allow for airflow.
- Extract any standing water from the floor using a wet-dry vacuum with a squeegee attachment.
- Set up a commercial dehumidifier in the center of the room and seal off the doorways with plastic sheeting.
- Place high-velocity fans so they blow directly into the holes you drilled in the wall.
- Monitor the moisture levels every twelve hours using a pin-type moisture meter.
Continue this process until the moisture meter indicates that the internal wall materials are at or below 12% moisture content. This may take anywhere from three to seven days depending on the volume of water and the local climate. Do not be tempted to stop early just because the drywall feels dry; the fiberglass inside takes much longer to release its hold on water. Patience is essential during this phase of the restoration. If you notice a musty odor developing at any point, it may be an indication that the drying is not happening fast enough and you might need to remove a larger section of the wall to expose the insulation directly to the air.
Potential Risks of Retaining Wet Insulation
While the goal is often to save money and effort, keeping wet fiberglass insulation can pose several risks if it is not dried perfectly. One of the primary concerns is the loss of the “loft” or fluffiness of the material. When fiberglass gets wet, the weight of the water can cause the glass fibers to stick together and flatten. Even after it dries, the material may remain compressed, which permanently reduces its ability to insulate your home. This can lead to cold spots in your house and higher energy bills during the winter months. If you find that your insulation has become a dense, thin mat, it is usually better to pull it out and replace it with fresh material to maintain your home’s thermal envelope.
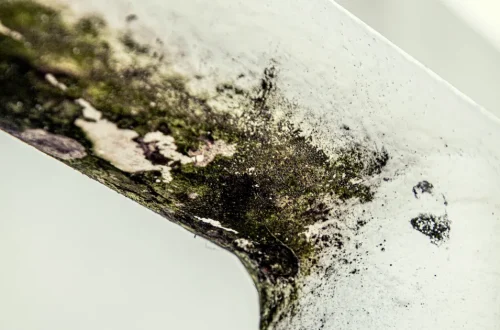
Beyond energy efficiency, the health of your home’s occupants is a major factor to consider. Wet insulation that stays damp for more than a few days becomes a prime breeding ground for mold and mildew. Because fiberglass is often backed by paper (kraft face), it provides a food source for mold spores when moisture is present. Once mold takes hold inside a wall cavity, it can be very difficult and expensive to remediate. For more information on safe cleanup practices, you can consult the FEMA flood recovery guidelines. Ensuring the wall is completely dry before sealing it back up is the only way to guarantee that you aren’t trapping a biological hazard inside your living space.
When to Replace vs. When to Dry
Deciding whether to dry out or replace your insulation often comes down to a cost-benefit analysis. In 2026, the price of fiberglass batts remains relatively low compared to the potential cost of mold remediation or structural repairs. If only a small section of the wall is wet, it is often faster and safer to simply cut out a square of drywall, remove the wet insulation, and put in new materials. This “cut and patch” method ensures that you have removed the problem entirely and allows you to inspect the wooden studs for any signs of pre-existing rot or insect damage. It also gives you a chance to upgrade to more modern, moisture-resistant insulation types if you live in a high-humidity area.
However, if the water has affected a large area, such as an entire basement or a long exterior wall, the cost of replacement can add up quickly. In these scenarios, the intensive drying methods discussed earlier are much more economical. You should also consider the age of your current insulation. If your home was built several decades ago, the existing fiberglass might be reaching the end of its lifespan anyway. Replacing it now with high-performance products can improve your home’s comfort and value. Ultimately, if you cannot get the moisture levels down within 72 hours, the risk of mold becomes too high, and replacement becomes the only responsible option for a healthy home environment.
Key Takeaways
- Acting within 24 to 48 hours is critical to prevent mold growth in wet fiberglass.
- Removing baseboards and drilling weep holes is necessary to provide airflow to the wall cavity.
- Professional-grade dehumidifiers and high-velocity fans are the most effective tools for deep drying.
- Contaminated “black water” requires immediate removal and disposal of all insulation and drywall.
- Check moisture levels with a meter to ensure the interior is below 12% before closing the wall.
- If fiberglass stays compressed after drying, it should be replaced to maintain R-value.
Frequently Asked Questions
Can I dry wet insulation without cutting the drywall?
It is possible to dry insulation without removing large sheets of drywall by using the “weep hole” method. By drilling small holes at the base of the wall and using high-pressure fans, you can force air into the cavity. However, this only works for minor moisture; if the insulation is soaking wet, you will likely need to remove at least the bottom portion of the drywall to allow for adequate evaporation.
How long does it take for fiberglass insulation to dry?
In ideal conditions with professional equipment, it typically takes between three and five days to fully dry out wet fiberglass inside a wall. Factors such as the amount of water, the temperature of the room, and the local humidity levels can extend this timeline to a week or more. It is essential to keep the fans running continuously during this entire period.
Is mold a guaranteed problem if insulation gets wet?
Mold is not a guarantee, but it is a very high risk if the material stays damp for more than 48 hours. Mold spores are present everywhere and only need moisture and a food source—like the paper backing on insulation—to begin growing. Fast action and aggressive drying are the only ways to prevent a mold colony from forming inside your walls.
Will wet fiberglass lose its R-value permanently?
Fiberglass loses its R-value while it is wet because water conducts heat much better than air. If the insulation dries completely and regains its original loft and thickness, the R-value should return to normal. However, if the fibers have matted down or the insulation has slumped to the bottom of the wall, the R-value will be permanently reduced, and replacement is recommended.
Should I use bleach to clean wet insulation?
You should never use bleach or other liquid cleaners on fiberglass insulation. The fibers are too dense for the cleaner to be effective, and adding more liquid will only worsen the moisture problem. If you suspect the insulation is contaminated or already has mold growth, the safest and most effective solution is to remove it and replace it with new, clean material.
Conclusion
Learning how to dry out wet fiberglass insulation inside a wall cavity can feel like a daunting task, but with the right approach, you can protect your home from long-term damage. By prioritizing airflow, using the correct tools, and being patient with the drying timeline, you can often save your materials and avoid a full-scale renovation. Remember that your home’s safety and air quality are the most important factors. If the job feels too big or the water was contaminated, do not hesitate to call in a professional restoration team to ensure your house remains a healthy haven throughout 2026 and beyond.