Navigating a water damaged drywall inspection and recovery guide is the first step toward preserving your home’s structural integrity and indoor air quality after a leak or flood. In 2026, homeowners face evolving challenges with modern building materials, making it crucial to understand how moisture interacts with gypsum and paper backing. When water infiltrates these porous surfaces, it can compromise the strength of the wall and create a breeding ground for hazardous biological growth. This comprehensive guide provides the technical knowledge needed to assess the severity of the damage, determine if a patch or a full replacement is necessary, and implement a recovery plan that adheres to the latest safety standards. By following a systematic approach, you can mitigate long-term costs and ensure that your living environment remains safe and aesthetically pleasing for years to come.
Identifying Early Signs of Drywall Moisture
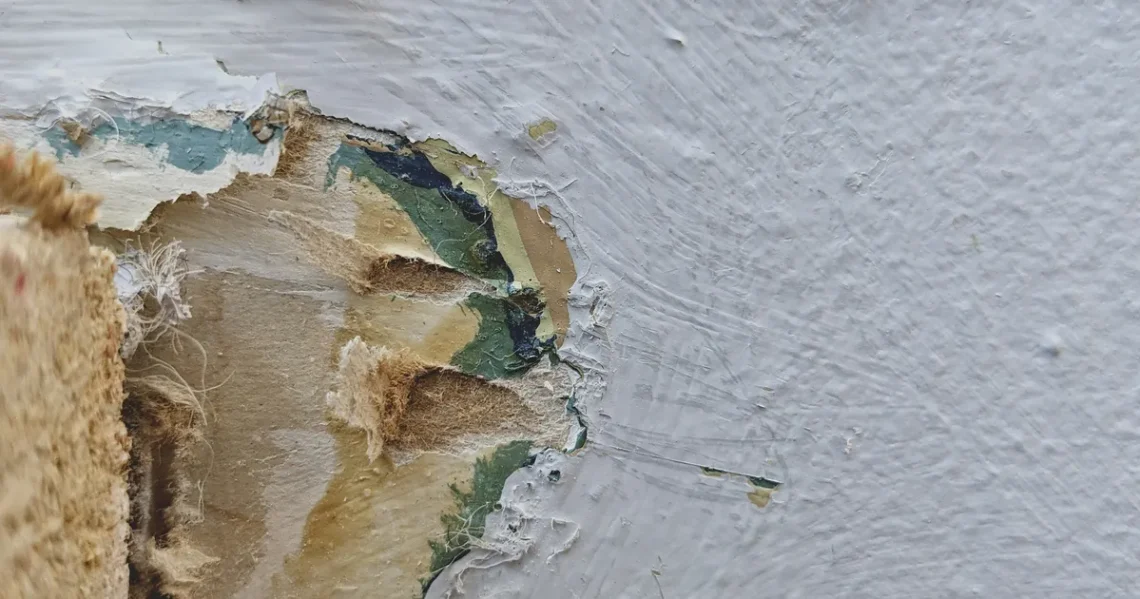
The first stage of any successful recovery involves a meticulous visual and tactile assessment of the affected areas. Early indicators of moisture infiltration often include subtle discoloration, such as yellow or brown staining, which suggests that water has seeped through the paper facing of the drywall. You might also notice bubbling or peeling paint, which occurs when the bond between the paint layer and the gypsum core is severed by trapped humidity. In more severe cases, the drywall may feel soft or “spongy” to the touch, indicating that the internal structure of the gypsum has begun to dissolve or lose its compression strength. Addressing these signs immediately prevents the weight of the wet material from causing a sudden structural collapse of the ceiling or wall sections.
Beyond visual cues, olfactory senses play a vital role in identifying hidden water issues behind the walls. A persistent musty or earthy odor is often the first sign that mold spores are colonizing the damp paper backing, even if the front surface appears relatively dry. It is essential to check the baseboards and the bottom edges of the wall, as gravity pulls water downward, causing it to pool at the floor level. If you observe swelling in the baseboards or a separation between the wall and the floor trim, it is a definitive sign that the internal cavity has been compromised. According to the Environmental Protection Agency at EPA.gov, managing moisture within 24 to 48 hours is the most effective way to prevent permanent damage and hazardous mold growth.
Advanced Tools for Accurate Inspection
While visual inspections are necessary, they are often insufficient for detecting moisture trapped deep within the wall cavity or behind insulation. Professional-grade recovery efforts in 2026 utilize non-invasive moisture meters and infrared thermography to map the exact boundaries of the affected area. A moisture meter provides a quantitative percentage of the water content relative to the material’s dry weight, allowing you to track the progress of the drying process over several days. If the reading exceeds 17% in drywall, the material is generally considered at high risk for mold and structural failure. These tools help you avoid unnecessary demolition by identifying exactly where the water stopped traveling, ensuring that your repairs are targeted and cost-effective rather than based on guesswork.
Infrared cameras take the inspection process a step further by detecting temperature differentials caused by evaporative cooling. Because wet drywall is typically cooler than dry areas, these cameras reveal “cold spots” that highlight the path of a leak from a roof or upper-floor pipe. This technology is particularly useful for inspecting ceilings where gravity might have pulled water several feet away from the original source. By combining moisture meter data with thermal imaging, you can create a comprehensive map of the damage. This data-driven approach is recommended by the IICRC at IICRC.org to ensure that restoration projects meet professional standards for dry-out and sanitation, reducing the likelihood of recurring issues.
Using a Moisture Meter Effectively
To use a moisture meter correctly, you must first calibrate the device for the specific material you are testing, which in this case is gypsum board. For pin-type meters, gently press the probes into the surface at various heights to find the highest concentration of moisture. For pinless meters, ensure the sensor plate is flat against the wall to get an accurate reading of the subsurface conditions. It is best practice to take readings every twelve inches vertically and horizontally around the visible stain to establish a “dry standard” from an unaffected part of the house. Consistently recording these numbers over a 72-hour period will tell you if your dehumidification efforts are working or if the water is still actively migrating through the studs.
Criteria for Repair vs Replacement
Determining whether to repair or replace water damaged drywall depends on the source of the water and the duration of exposure. If the water came from a clean source, such as a burst supply line, and was addressed within 24 hours, the drywall can often be saved through aggressive drying and professional dehumidification. However, if the water is “Category 3” or “black water”—originating from sewage or outdoor flooding—the drywall must be removed and discarded regardless of its structural appearance. This is because the porous nature of the gypsum traps pathogens and contaminants that cannot be effectively neutralized through surface cleaning. Safety should always be the priority when dealing with contaminated water sources to prevent long-term health complications.
Structural integrity is the second major factor in the decision-making process for home restoration projects. If the drywall has begun to sag or if the fasteners have pulled through the softened core, the material has lost its ability to support its own weight and must be replaced. Small areas of localized damage, such as a circular stain from a minor leak, can typically be cut out and patched with new material. However, if the water has climbed more than two feet up the wall via capillary action, it is often more efficient and structurally sound to remove the bottom four feet of drywall throughout the room. This “flood cut” allows for better airflow to dry the interior studs and prevents the hidden growth of mold on the backside of the board.
| Damage Level | Visual Symptoms | Recommended Action |
|---|---|---|
| Minor | Small stains, no sagging | Dry and patch affected area |
| Moderate | Bubbling paint, soft spots | Remove section, check insulation |
| Severe | Sagging, mold growth, black water | Full replacement and sanitation |
The Drywall Recovery and Restoration Process
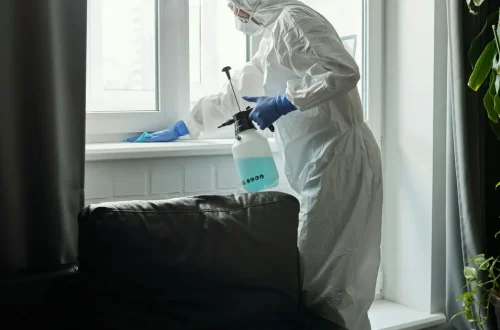
The recovery process begins with ensuring the environment is safe for work, which includes turning off electrical breakers to the affected rooms and wearing appropriate personal protective equipment. Once the area is secured, you must remove all wet insulation, as fiberglass and cellulose act like a sponge and will prevent the wall studs from drying if left in place. Use a utility knife or a drywall saw to cut at least 12 inches beyond the visible moisture line to ensure you are reaching dry, stable material. During this phase, it is critical to inspect the interior wall cavity for any signs of mold or wood rot on the framing. If the studs are wet, they should be treated with an antimicrobial solution to prevent fungal growth before the new drywall is installed.
Effective drying is the most time-consuming part of the recovery guide and requires high-velocity air movers and industrial-grade dehumidifiers. Simply opening windows is rarely sufficient to pull deep-seated moisture out of the wooden framing and the remaining drywall edges. In 2026, the standard for a “dry” home involves maintaining a relative humidity below 40% to facilitate rapid evaporation. You should leave the drying equipment running continuously for at least three to five days, monitoring the moisture levels daily until they return to the baseline of your dry standard. Only after the moisture meter confirms that the studs and surrounding materials are dry should you proceed with hanging new gypsum board and applying joint compound.
Preventing Future Mold and Mildew Growth
Mold prevention is an integral part of the recovery phase because moisture often lingers in microscopic crevices long after the surface feels dry. After the demolition of damaged sections, applying a borate-based antimicrobial spray to the exposed wooden studs provides a long-lasting barrier against fungal spores. It is also important to ensure that the source of the water has been completely resolved, whether it was a roofing failure, a plumbing leak, or poor exterior drainage. For areas prone to high humidity, such as bathrooms or basements, consider replacing the damaged sections with moisture-resistant “green board” or mold-resistant “purple board” which features a fiberglass mat instead of paper facing. These materials are specifically designed to inhibit the growth of mold even in damp conditions.
Ventilation improvements are often necessary to prevent future occurrences of moisture-related drywall failure. Installing higher-CFM exhaust fans in kitchens and bathrooms can significantly reduce the ambient humidity that contributes to ceiling damage. Additionally, check that your attic is properly vented to prevent ice dams and condensation, which frequently lead to mystery leaks in the winter months. According to FEMA guidelines found at FEMA.gov, proper grading and gutter maintenance are also essential to keep water away from the foundation and out of the crawlspace. By addressing the root cause of the moisture and upgrading your materials during the recovery process, you create a more resilient home that can withstand future environmental challenges.
When to Consult a Professional Specialist
While many minor drywall repairs can be handled by a motivated homeowner, large-scale water damage often requires the expertise of a professional restoration contractor. Professionals have access to high-capacity desiccant dehumidifiers that can pull moisture from the air much faster than consumer models, which is critical for saving expensive hardwood floors or structural timber. Furthermore, if the water damage involves a large area of the ceiling, the risk of a collapse is high, and professional shoring may be required to keep the structure safe during the tear-out. A specialist can also provide a certified moisture map and documentation, which is often required by insurance companies to approve a claim and ensure the property value is maintained.
Environmental testing is another area where professionals provide essential services, particularly in older homes where asbestos or lead paint may be present. Disturbing these materials during a drywall tear-out can release toxic fibers or dust into the air, necessitating a professional abatement team. If you discover a significant amount of mold—typically defined as an area larger than ten square feet—the EPA recommends hiring a mold remediation specialist to prevent the spread of spores to the rest of the house. Professionals use negative air machines and HEPA filtration to contain the work zone, ensuring that the recovery process does not inadvertently cause a secondary health crisis for the occupants of the home.
Key Takeaways
- Act Fast: You have a 24 to 48-hour window to dry materials before mold growth becomes a significant risk.
- Source Matters: Always discard drywall contaminated by sewage or outdoor flood water (Category 3).
- Use Tools: Rely on moisture meters and infrared cameras rather than visual checks alone to find hidden water.
- Cut Wide: Remove at least 12 inches of dry-looking material beyond the wet spot to ensure total removal of dampness.
- Treat Studs: Apply antimicrobial solutions to the wall framing before sealing it back up with new drywall.
- Ventilate: Use industrial dehumidifiers to keep humidity levels below 40% during the critical drying phase.
Frequently Asked Questions
How long does it take for drywall to dry after a leak?
Under ideal conditions with high-velocity air movers and professional dehumidifiers, drywall and the underlying studs usually take between three to five days to dry completely. In 2026, the use of advanced desiccant technology can sometimes shorten this window, but it is essential to verify the status with a moisture meter before beginning repairs.
Can I just paint over a water stain on the ceiling?
Painting over a stain is a temporary cosmetic fix that does not address the underlying problem. If the drywall is still wet, the paint will eventually bubble and peel, and mold may grow behind the surface. You must first stop the leak, dry the material, and use a stain-blocking primer like Kilz or Zinsser before applying a topcoat of paint.
Is moldy drywall always a health hazard?
Yes, mold on drywall can release allergens and mycotoxins into the air, which can cause respiratory issues, headaches, and allergic reactions. Even if you are not currently experiencing symptoms, the presence of mold indicates a moisture problem that can degrade your home’s air quality and structural integrity over time.
What is the difference between green board and regular drywall?
Green board is a type of drywall with a water-resistant paper covering and a specially treated core, making it suitable for high-moisture areas like bathrooms. However, it is not waterproof and should not be used in areas with direct water contact, such as shower stalls, where cement board is the preferred substrate for tile.
Does homeowners insurance cover water damaged drywall?
Most policies cover water damage if it is “sudden and accidental,” such as a pipe bursting or an appliance failing. However, damage caused by long-term neglect, lack of maintenance, or regional flooding usually requires a separate flood insurance policy. Always document the damage with photos and moisture readings to support your claim in 2026.
Conclusion
Completing a water damaged drywall inspection and recovery guide requires patience, the right tools, and a commitment to safety. By understanding the science of moisture migration and the limitations of building materials, you can make informed decisions that protect your home from long-term decay. Whether you are performing a small patch or managing a major restoration, following these professional standards ensures a high-quality result. Remember that the goal of recovery is not just to make the wall look new again, but to ensure that the hidden structures within your home remain dry, clean, and structurally sound for the future.
- How to Fix a Sagging Garage Ceiling: Support Repair Guide for Minor Sagging
- Burning Smell From Electrical Outlet? How To Identify It Safely
- Emergency Flat Roof Tarping: How to Prevent Water Pooling and Leaks
- Best Tools Every DIY Home Repair Beginner Should Own
- Mastering Home Repair Safety: Risk Assessment & Compliance Standards